
Introduction to Pan Frying Chicken Breast Without Drying It Out
Cooking a juicy pan-fried chicken breast can sometimes feel like chasing a unicorn – elusive and tricky! The secret to success lies in mastering the skillet technique which lets you lock in moisture and create mouthwatering flavor. In fact, if you’ve struggled with dry, rubbery chicken breast before, don’t worry — you’re not alone. The good news? With the right approach, you can enjoy tender, moist chicken straight from your pan every single time.
Why does chicken drying out during cooking seem so common? Well, it’s because chicken breast is a lean cut with very little fat to protect it during heat exposure. If you want to learn more about mastering the skillet technique for juicy results, you’re in the right place. Let’s dive in!
Why Chicken Breast Tends to Dry Out
Chicken breast dries out so often because it has low fat content and can quickly lose moisture when cooked improperly. When exposed to high heat for too long, its proteins tighten, squeezing out the natural juices that keep it tender. This is why techniques like searing or cooking at the wrong temperature can turn your bird into a tough chew.
Interestingly, the key to juicy chicken often involves preventing this moisture loss by balancing heat and cooking time carefully. If you’re curious, check out how keeping thin cuts juicy in the pan can make a huge difference.
Benefits of Pan Frying Chicken Breast
Pan frying chicken breast offers the perfect blend of flavor, texture, and control. Unlike baking or boiling, pan frying lets you develop a crisp, golden crust while sealing in the natural juices. A hot pan coupled with a bit of oil creates that lovely Maillard reaction everyone craves. Plus, it’s fast and gives you the freedom to add herbs, butter, or aromatics easily.
Another benefit is versatility. You can quickly adapt the method to different recipes — whether you’re going for a classic skillet chicken or want to jazz it up with chicken breast recipes that are easy, juicy, and delicious.
Preparing Chicken Breast for Pan Frying
Selecting the Right Cut
Choosing the right chicken breast is the first step to a juicy pan-fried chicken breast. Go for fresh, plump breasts that are uniform in thickness to ensure even cooking. Avoid overly large or uneven cuts that will cook unevenly and risk dryness on the thinner parts.
If you want a shortcut, look into thin sliced chicken breast recipes which are great for quick, uniform cooking.
Proper Thawing and Brining Techniques
Frozen chicken needs to be thawed properly for even cooking. The best way is to thaw it slowly in the refrigerator overnight. If you’re pressed for time, cold water thawing is your friend, but avoid microwaving as it can start the cooking process unevenly.
Brining is a game-changer for moisture retention. Soaking chicken breast in a saltwater solution for at least 30 minutes helps the meat absorb and hold onto water, making the final dish much juicier. For a deeper dive, explore the science of brining. It’s simple chemistry that every home cook should know!
Essential Tips for Preventing Dryness While Pan Frying
Using the Right Heat Levels
Heat control is like the throttle of a sports car — too much or too little can ruin the drive. Start with medium-high heat to get that initial sear. This high heat creates a flavorful crust without drying the interior. Then, turn down the heat to medium or medium-low to finish cooking gently and keep moisture locked inside.
Cooking with consistent heat avoids hot spots that can burn the outside while leaving the inside undercooked. Managing heat levels well is critical to evenly cooked, tender chicken. For more on temperature control, check out keeping thin cuts juicy in the pan.
Searing Before Lower Heat Cooking
Searing is your golden ticket to flavor and juiciness. When you throw chicken breast into a hot pan with a bit of oil, the surface proteins brown rapidly, forming a delicious crust — think of it as a tasty, moisture-trapping armor.
After a good sear (about 2-3 minutes on each side), lower your pan’s heat and let the chicken gently finish cooking. This combo ensures you’re not rushing the internal cook which would squeeze out juices and cause dryness.
Covering the Pan to Retain Moisture
Ever wondered why steamy environments keep food moist? Covering your pan while finishing the chicken helps trap steam and heat, creating a mini-oven effect. This moisture cushion slows evaporation from the chicken, keeping it juicy and tender.
Be sure to remove the lid towards the end if you want to crisp up the crust once more. This simple trick balances moisture retention with texture beautifully.
Determining the Perfect Internal Temperature
Nothing guarantees juicy chicken like cooking it perfectly to the safe temperature. Use a reliable meat thermometer — the ideal internal temperature for chicken breast is 165°F (74°C). Overcooking past this point is the quickest way to dryness.
Learn more about the safe minimum internal temperature guidelines to cook confidently.
Step-by-Step Guide to Pan Frying Chicken Breast
Preparing the Pan and Ingredients
Start by gathering your chicken breasts, oil (like canola or avocado for high smoke points), salt, pepper, and optional herbs or garlic. Heat your pan over medium-high heat and add the oil just before the chicken to avoid smoking.
Also, pat your chicken dry to help the sear process — excess moisture will steam the meat instead of crisping it.
Cooking Process Explained
- Place the chicken breast gently in the hot pan. Avoid moving it immediately to allow a crust to form—around 2-3 minutes.
- Flip and sear the other side for the same duration.
- Reduce heat to medium or medium-low, cover the pan to keep moisture, and cook for 5-7 more minutes, flipping halfway.
- Use a meat thermometer to check for 165°F internal temperature.
This technique from our detailed guide to pan-searing ensures you don’t overcook or undercook your chicken. The gradual heat drop after searing is the magic that keeps your chicken juicy.
Resting the Chicken Post-Cooking
Don’t rush to cut your chicken right away! Rest it for 5 minutes on a plate loosely covered with foil. This resting phase allows juices to redistribute inside the meat instead of spilling out when sliced. It’s like giving your chicken time to catch its breath — totally worth it!
Common Mistakes to Avoid
Overcooking and How to Prevent It
Overcooking chicken breast is like squeezing out the magic potion. It causes the meat to become tough and dry. To avoid this, rely on a meat thermometer to ensure the internal temperature hits that perfect 165°F and no higher.
Cooking time can vary based on thickness. Consider pounding breasts to an even thickness or slicing them thin for faster cooking. This also helps with cooking chicken evenly.
Cooking at Too High Heat
Ever burnt your chicken? Cooking at excessively high heat can scorch the outside while leaving the inside raw or dry. This heat shock toughens the protein, ruining the texture.
Start with high heat just for searing, then drop it to medium or medium-low to finish cooking gently. Your pan and temperature control prevent that dreaded burnt taste.
Enhancing Flavor While Keeping Chicken Moist
Marinades and Seasonings That Help Retain Moisture
A well-crafted marinade is your flavor and moisture buddy. Acidic ingredients like lemon juice, yogurt, or vinegar in marinades tenderize meat fibers, allowing them to soak up water and aromas, locking in juiciness.
Check out these marinade recipes that add moisture for scrumptious ideas. Salt in marinades also acts like a brine, enhancing moisture retention.
Using Butter, Oils, and Aromatics
Butter and oils are like bodyguards for your chicken breasts. They help conduct heat evenly, prevent sticking, and add richness. Aromatics like garlic, thyme, or rosemary infused in butter baste the meat, adding incredible flavor.
Learning to create a beautiful crust with butter basting boosts not only moisture but complexity in every bite.
Alternative Techniques and Variations
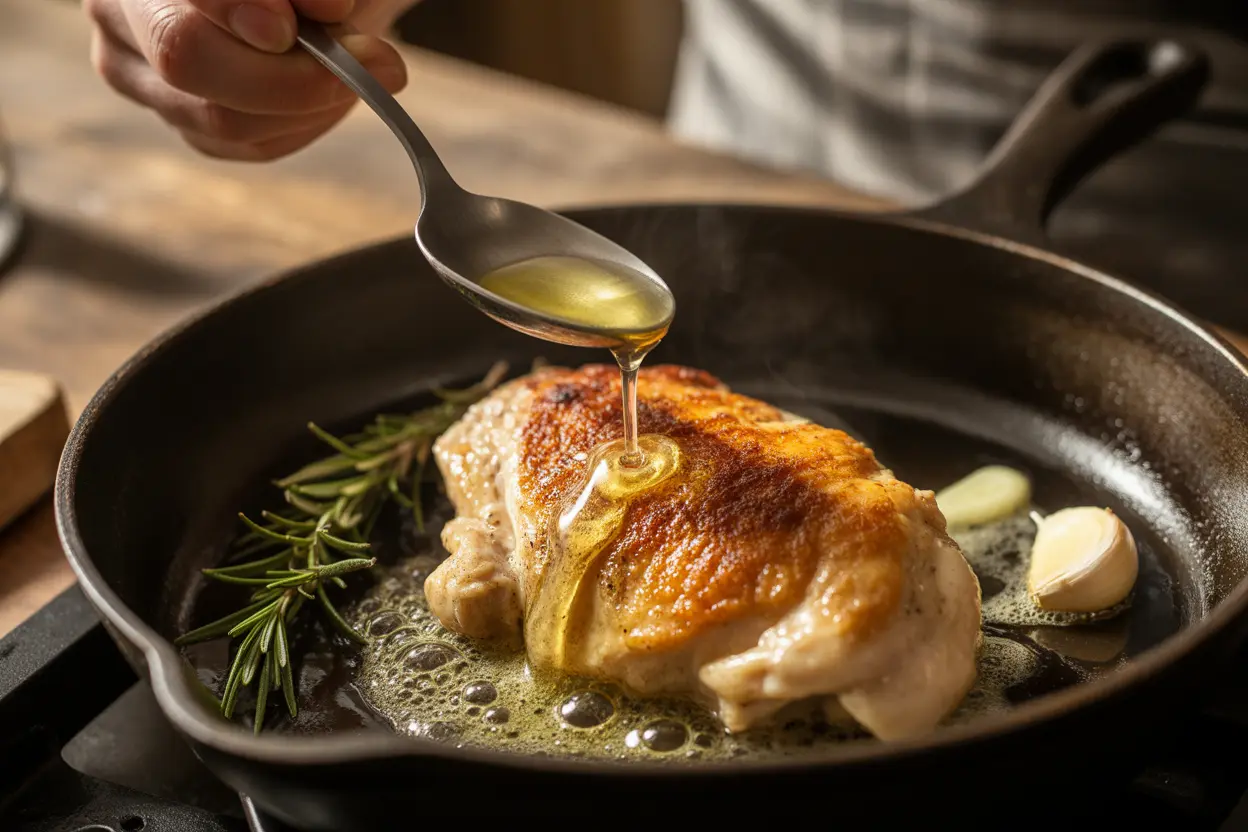
Butter Basting for Extra Juiciness
After searing, add a knob of butter and your favorite herbs to the pan. Tilt the pan slightly and spoon melted butter continuously over the chicken. This butter basting gently cooks the meat while infusing flavor and keeping it moist.
Butter basting is like a spa treatment for your chicken breast – pampering it to juicy perfection.
Using a Meat Thermometer for Precision
Precision is key to juicy pan-fried chicken breast. A meat thermometer removes guesswork, ensuring you hit exact internal temperatures without overcooking.
Check out how to use a meat thermometer correctly to bake, pan-fry, or grill your chicken flawlessly every time.
FAQs
How do you keep chicken breast moist when pan frying?
Keeping chicken breast moist while pan frying involves using medium heat after searing, covering the pan to retain steam, and cooking to the right internal temperature (165°F). Also, brining or marinating the chicken beforehand adds moisture. Don’t forget to let the chicken rest after cooking to allow juices to redistribute, ensuring every bite is juicy and tender.
What is the best temperature to pan fry chicken breast?
The best temperature starts with medium-high heat for searing (about 375°F pan surface) to create a crispy crust. Then reduce to medium or medium-low heat (around 300°F) to cook through without drying the chicken. Always monitor internal temperature with a meat thermometer to avoid overcooking.
Should you cover the pan when frying chicken breast?
Covering the pan after searing helps trap steam, creating a moist cooking environment beneficial for the chicken. It retains moisture and cooks the inside evenly. However, remove the cover towards the end if you want to re-crisp the crust. This balance helps achieve juicy pan-fried chicken breast with a lovely crust.
How long should you cook chicken breast in a pan?
Cook time varies depending on thickness and heat level. Typically, sear each side for 2-3 minutes over medium-high heat, then lower heat and cook covered for an additional 5-7 minutes. Always rely on a meat thermometer, aiming for 165°F internal temperature for safe and juicy chicken.
What are some tips for juicy pan-fried chicken?
To get juicy pan-fried chicken, use uniform thickness cuts, brine or marinate to add moisture, sear on high heat then finish on low, cover while cooking to trap steam, and use a meat thermometer for precise cooking. Rest the chicken before slicing to keep juices locked in. Incorporating aromatics and butter basting elevates flavor and juiciness.
Conclusion
Perfecting a juicy pan-fried chicken breast isn’t about luck; it’s about technique. Properly prepping your chicken, selecting the right cut, and understanding heat levels are the foundation. Employ moisture-retaining methods like brining, covering the pan, and butter basting to take it a notch higher. Avoid common pitfalls such as overcooking or too-high heat, and embrace tools like a meat thermometer for precision.
By applying these tips, you’ll turn out moist, flavorful chicken every time, transforming dinner into a delightful experience. For more culinary magic, explore additional chicken breast recipes and techniques tailored to make your meals unforgettable.